{tocmero} $title={Table of Contents}
What is Domain Verification?
Domain Verification provides a way for you to claim ownership of your domain in Google Sites. This ownership allows you to control editing privileges of your links and other content to prevent misuse of your domain and to keep bad actors from spreading misinformation.Verify your domain for your Google sites
You verify your domain through your domain host (typically where you purchased your domain name). Your domain host maintains settings called DNS records that direct internet traffic to your domain name. For details, see Identify your domain host.Google gives you a TXT verification record to add to your domain host's DNS records. When Google sees the record exists, your domain ownership is confirmed.
Verify ownership of your domain Adding a TXT verification record (any domain host)
Note: The administrator that gets the verification record needs to complete the verification process. The verification records are unique to each administrator, so one administrator cannot finish a domain verification that was started by another.
Step 1:
Get your unique verification record Code
- Go to Google Search Console and longin with your gmail and password.
- If you already signed up for Goohle search console but didn't complete the setup process, you can pick up where you left off.
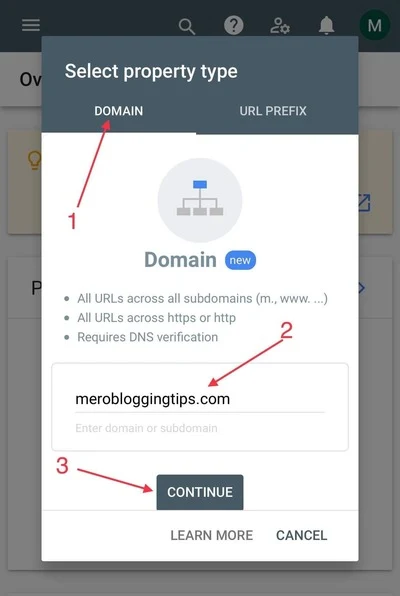
In the navigation pane, choose Add property or Search property and Click Add property. - In the Domain (not URL prefix) option, enter the domain you want to verify. For example, mydomain.com.
- Click Continue.
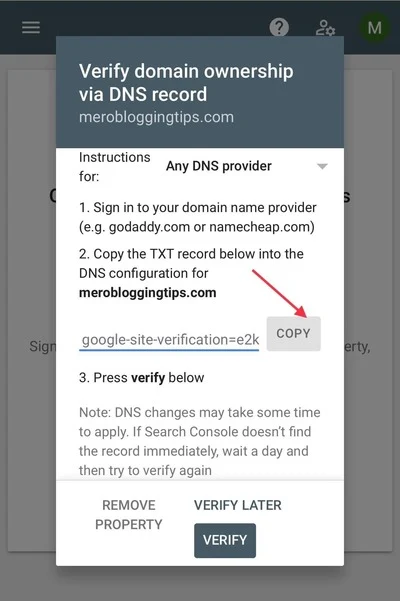
- Follow the instructions for "Any DNS Provider."
- Copy the TXT record that Google Search Console provides it's time to add it to your DNS records.


Step 2:
Go to your domain's DNS records
- In a second browser window or tab, sign in to your domain host account. For details, see Identify your domain host.
- Go to your domain's DNS records. The page might be called something like DNS Management, Name Server Management, Control Panel, or Advanced Settings.
Step 3:
Add the verification record to your domain host
When you add a TXT record values to your domain's DNS settings, you enter specific values depending on what you're using the TXT record for. Below are the values to use when configuring TXT records for various uses with Google services.You enter these values at your domain host, not in your Google Admin console. Note also that some hosts use different labels for the name and value fields.
- For the record type, select TXT.
- In the Name/Host/Alias field, enter @ or leave it blank. Your host might require you to enter your domain, which looks like example.com, into this field. Your other DNS records might indicate what you should enter.
- Time to Live (TTL) is the number of seconds before subsequent changes to the TXT record go into effect. This value is 3600 for all TXT records or leave the default.
- In the Value/Answer/Destination field, paste the verification record you copied in step 1.
- Save the record.

Note: If you see a warning message about changing your DNS settings, disregard it. Adding the TXT record won't damage your website or DNS settings.
Step 4:
Tell Google to verify
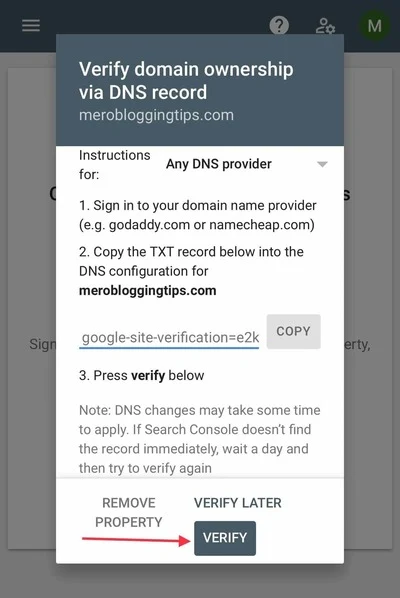
- After you’ve added the TXT record to your DNS records, Return to the setup tool in the google search console and click Verify.

This article shows you how to verify your domain with TXT verification record.
