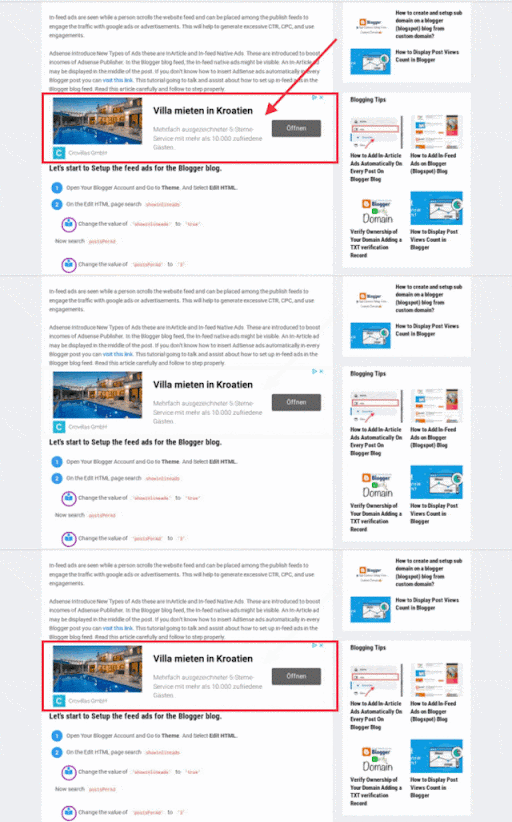
This tutorial will discuss about How to automatically add AdSense ads or Advertisement into the middle of every Blogger blog post? So let's follow the steps provided below properly.
These are benefits of Adding Adsense Ads autometically in every Blog Post.
- It is very tough and time-consuming to pick AdSense Ad code from AdSense and add it to every blog post. Sometimes we may forget to add the codes. This leads to a loss in revenue. It's solution is to add the AdSense ads code or other advertisement once and relax. Your AdSense ads code will insert in every blog post automatically.
- We can quickly implement Adsense Ad code to show ads in the middle of every post. For this, use "text and image", "text-only ads", or a new type of Native Ads, "In-Article Ads".
If you’re looking to place AdSense ads automatically in the Blogger feed, read our article how to set up In-feed ads for Blogger (blogspot) blog.
How to apply Adsense ads automatically in the Blogger posts?
Google introduced new kinds of native ads for its publishers to increase revenue and a good user experience. According to Google, these native kinds of ads can increase AdSense revenue by 60%. But as per our experience, we’ll advise placing “Text and Image” type of AdSense Ads for better results.
But here, you can add any ad unit using our code provided below to implement ads in the middle of a Blogger (blogspot) blog. Just copy the provided code, change ad unit values and place it as suggested in this article.
Insert AdSense ads code in every Blogger post automatically, using XML code.
By implementing the code provided below into your Blogger template xml file, you can show AdSense ads on every Blogger post. For this, you need to edit the Blogger Theme.
First of all generate your Native In-Article Ad
- Open the Google Adsense Account
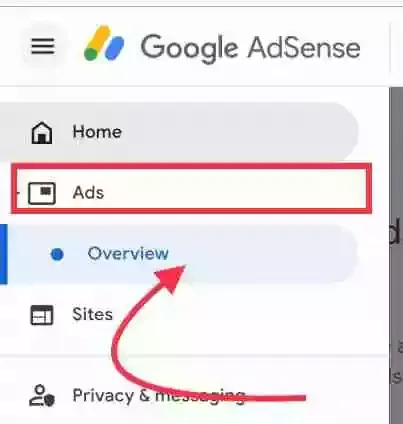
- Go to the Ads
- Click on By ad unit and select Native in-article ads
- Generate Adsense Ad or any ads(Text and Image) code Click on Save and get code button
- Copy Google Adsense Ad Code and Click on I'm done button then, save it somewhere or stay on this page and open new tab or browser.


Edit your blogger template
- Now go to the draft.blogger.com
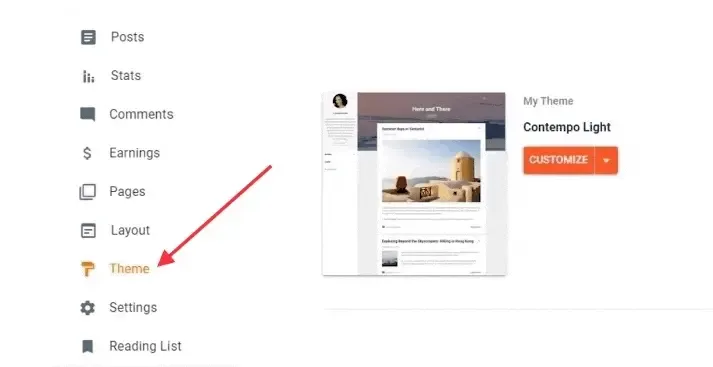
- Menu » Theme.
- Download the theme file for backup.
- Now click on Edit HTML.
- Now you’ll see XML of your blog. And Now search </main>.
- Copy bellow xml (html) Code and Paste it just above the </main>. If you couldn't find the code </main> on your blogger template paste just before </body> tag.
- Replace line <!-- Place Your Adsense Ad code here --> with the Adsense ad code, you have generated before.
- Now find </body> and Copy the following Javascript code, then, paste it just before </body>.
- Now Save your template.

<b:section cond='data:view.isPost' id='in-article-ad-1' maxwidgets='1' name='In Article ADS 1' showaddelement='yes'>
    <b:widget id='HTML555' locked='true' title='' type='HTML' version='2' visible='true'>
        <b:widget-settings>
            <b:widget-setting name='content'><![CDATA[<!-- Place Your Adsense Ad code here -->]]></b:widget-setting>
        </b:widget-settings>
        <b:includable id='main'>
            <div class='html-content in-article-ads'>
                <data:content/>
            </div>
        </b:includable>
    </b:widget>
</b:section>
<script type='text/javascript'>
//<![CDATA[
// In Article Ad
function insertAfter(Ads,targetAds) {var inarticlead = targetAds.parentNode;if (inarticlead.lastChild == targetAds) {inarticlead.appendChild(Ads);}else {inarticlead.insertBefore(Ads,targetAds.nextSibling);}};var targetAds = document.getElementById("post-body");var inarticleAd1 = document.getElementById("in-article-ad-1");var showinarticleAd1 = targetAds.getElementsByTagName("br");if (showinarticleAd1.length > 0) {insertAfter(inarticleAd1,showinarticleAd1[3]);};
//]]></script>
If you want to add your adsense code automatically you don't need to generate your google adsense ad code manually just Replace line <!-- Place Your Adsense Ad code here --> with the following Adsense code. Replace line ca-pub-1234567890 with your google adsense publisher id.
<script async src="https://pagead2.googlesyndication.com/pagead/js/adsbygoogle.js?client=ca-pub-1234567890" crossorigin="anonymous"/>
<ins class='adsbygoogle' data-ad-format='auto' data-full-width-responsive='true' expr:data-ad-client='data:adClientId ?:data:blog.adsenseClientId' expr:data-ad-host='data:blog.adsenseHostId' expr:data-analytics-uacct='data:blog.analyticsAccount Number' expr:style='data:style ?: " display:block;"' style='display:block'> </ins><script>(adsbygoogle = window.adsbygoogle || []).push({});</script>
Changes to be made:
- Replace <!-- Place Your Adsense Ad code here --> with your own Google ads code.
- This code you replaced will appear in the middle of Blogger Blog as an Adsense ad.
- The Adsense Ad will place after the 3rd <br /> of the Blogger post.
Place Multiple AdSense ads Automatically in Every Post of Blogger
If you want to place more than one Adsense Ad between the multiple paragraphs of the Blogger post, Replace the code given below instead of the previous code.
xml (html) Code for Multiple AdSense ads Automatically in Every Post of Blogger
<b:section cond='data:view.isPost' id='in-article-ad-1' maxwidgets='1' name='In Article ADS 1' showaddelement='yes'>
    <b:widget id='HTML555' locked='true' title='' type='HTML' version='2' visible='true'>
        <b:widget-settings>
            <b:widget-setting name='content'><![CDATA[<!-- Place Your Adsense Ad code here -->]]></b:widget-setting>
        </b:widget-settings>
        <b:includable id='main'>
            <div class='html-content in-article-ads'>
                <data:content/>
            </div>
        </b:includable>
    </b:widget>
</b:section>

<b:section cond='data:view.isPost' id='in-article-ad-2' maxwidgets='1' name='In Article ADS 2' showaddelement='yes'>
    <b:widget id='HTML666' locked='true' title='' type='HTML' version='2' visible='true'>
        <b:widget-settings>
            <b:widget-setting name='content'><![CDATA[<!-- Place Your Adsense Ad code here -->]]></b:widget-setting>
        </b:widget-settings>
        <b:includable id='main'>
            <div class='html-content in-article-ads'>
                <data:content/>
            </div>
        </b:includable>
    </b:widget>
</b:section>
Javascript Code for Multiple AdSense ads Automatically in Every Post of Blogger
<script type='text/javascript'>
//<![CDATA[
// In Article Ads
function insertAfter(Ads,targetAds) {var inarticlead = targetAds.parentNode;if (inarticlead.lastChild == targetAds) {inarticlead.appendChild(Ads);}else {inarticlead.insertBefore(Ads,targetAds.nextSibling);}};var targetAds = document.getElementById("post-body");var inarticleAd1 = document.getElementById("in-article-ad-1");var showinarticleAd1 = targetAds.getElementsByTagName("br");if (showinarticleAd1.length > 0) {insertAfter(inarticleAd1,showinarticleAd1[3]);};var inarticleAd2 = document.getElementById("in-article-ad-2");var showinarticleAd2 = targetAds.getElementsByTagName("br");if (showinarticleAd2.length > 0) {insertAfter(inarticleAd2,showinarticleAd2[6]);};
//]]></script>
Place the two different AdSense ads in the <!-- Place Your Adsense Ad code here -->. We recommend you to place a max of 2 ads if your article is 600 words long. If you place a higher number of ads, then invalid clicks may increase and lower the CPC you get. That is completely a wrong practice.
- targetAds.getElementsByTagName("br"); Declares the ads’s location. Here to default tag for Blogger post is br for the break <br />.
- You can change it to p, h2, h3, h4 according to the need. If you don’t know what this is, then leave it as it is.
- insertAfter(inarticleAd1,showinarticleAd1[n]); or insertAfter(inarticleAd2,showinarticleAd2[n]); Declared how many tags the ads should be visible. Where numerial=number of tags-1, i.e., If you want to show ad for 4 tags, n will be 4-1=3.
- So if you want to display after 1 line break, then place 0 instead of 4, display an ad after 2 tags, then put 1 instead of 3, and so on.
We aim to increase AdSense revenue of our website or blog. For this, focus on writing SEO Friendly content that leads results in high CPC.

Good work sir
ReplyDeleteI need help to add automatic mluti ads to articals but not adsense its adstera
Replace your Adsterra ads code instead of Google Adsense Ads code
Delete