
To create your Blogspot blog go to the www.blogger.com on your internet address bar.
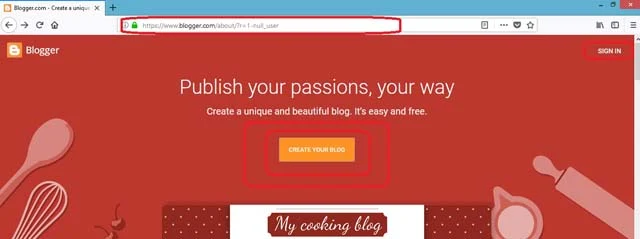
STEP 1. Click on create your blog.
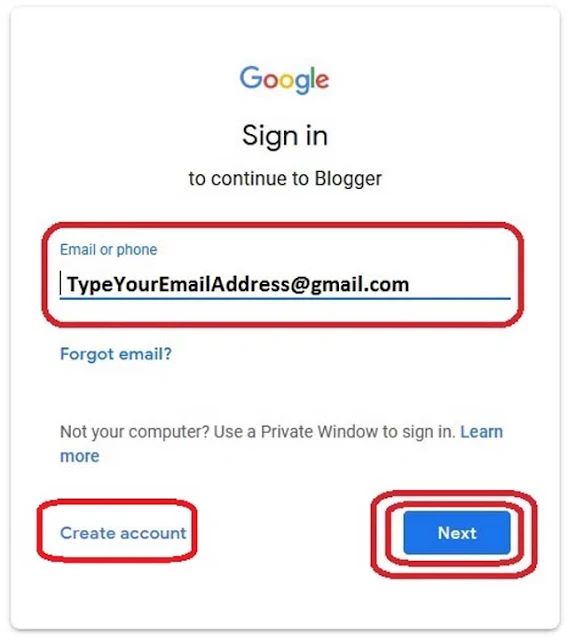
STEP 2. To continue to blogger enter your email address to sign in then click on Next button. if don't have a Google account (Gmail Id) create one.
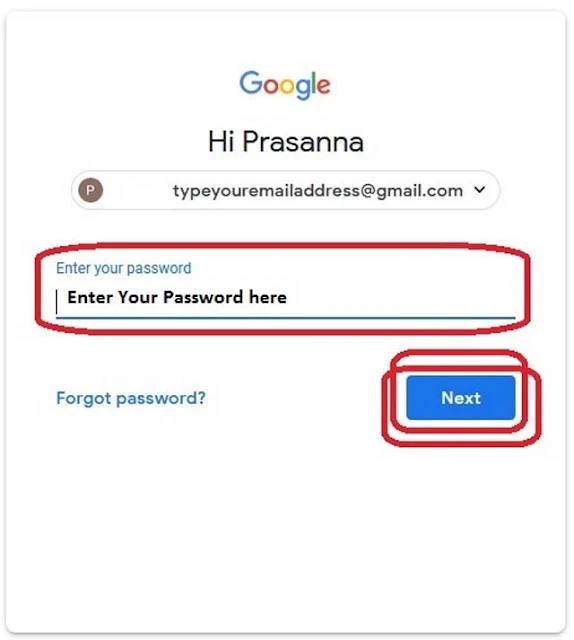
STEP 3. Enter your Gmail Account password. Then, click on the Next button.
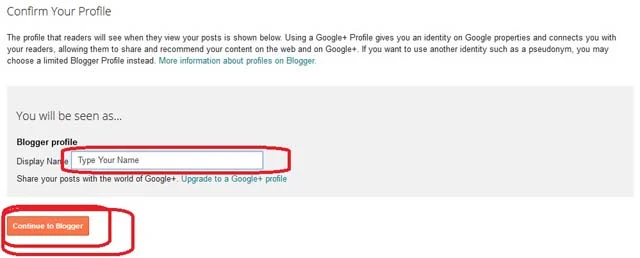
Type your name and click on Continue to Blogger button.

STEP 5. Click on Create your blog button.
STEP 6. Now you can Customize or Edit HTML of your blog. you can write posts, you can add pages. you can change the layout and upload a new theme also.
Most importantly, you should change your blog’s template at first. to change the theme you can Edit HTML otherwise you can use third-party blog template. There are too many blog templates available free version and the premium version on the third-party website. You can download and install. to install the third-party template Click on Backup / Restore button on the right side corner.

To change Layout click on Layout. You can add an icon, header and you can add or remove the gadget.

STEP 7. To optimize your blog Click on Setting.


Write your page title and content and click on the Publish button.
STEP 9. Write Post
STEP 1. Click on create your blog.
- To create a Google account (Gmail Id) Click on the link below.
STEP 4. For a first time user, you will see an option to use the identity from your Blogger profile.
Type your name and click on Continue to Blogger button.
STEP 5. Click on Create your blog button.
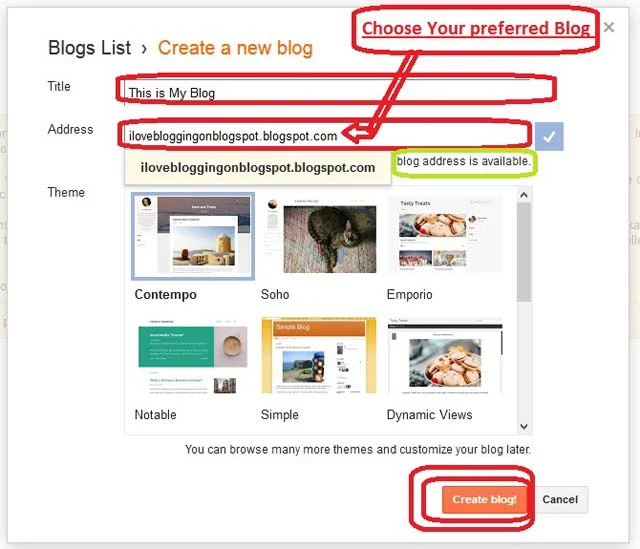
- The first thing you need to do is add a title and select your preferred blog domain name. Choose a short domain name that is relevant to your blog topic.
- Avoid using your personal name as the domain name, and instead, use some generic domain name that you can brand later with a custom domain.
- You can then select a suitable blog template (decides how your blog will look on the front end and don’t worry you can change it anytime) and click on “Create Blog ”
- Finally, you have created a free Blogspot blog.
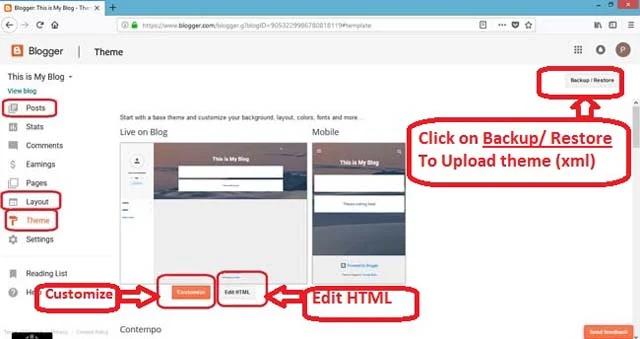
STEP 6. Now you can Customize or Edit HTML of your blog. you can write posts, you can add pages. you can change the layout and upload a new theme also.
Most importantly, you should change your blog’s template at first. to change the theme you can Edit HTML otherwise you can use third-party blog template. There are too many blog templates available free version and the premium version on the third-party website. You can download and install. to install the third-party template Click on Backup / Restore button on the right side corner.
Free download Premium Version of Blogger Template Click Me
- Browse downloaded XML file then Click on the Upload button.
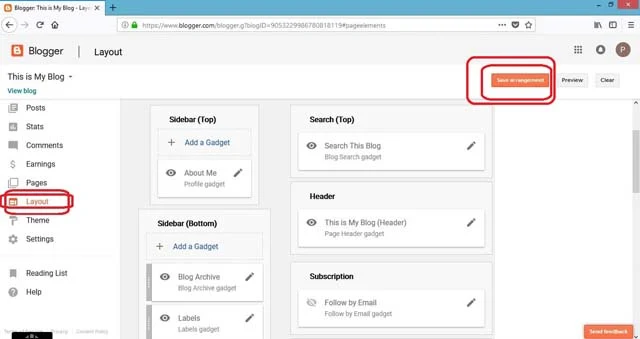
To change Layout click on Layout. You can add an icon, header and you can add or remove the gadget.
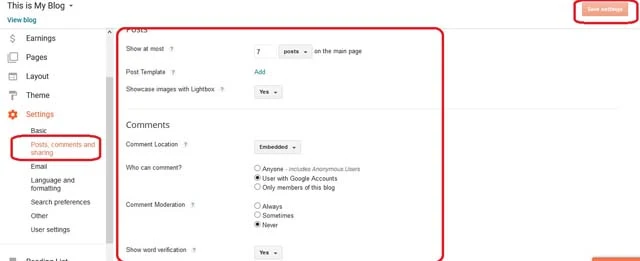
STEP 7. To optimize your blog Click on Setting.
- Basic
- Add or Change your Blog Title.
- Add a description. Adding a description to your blogger blog helps readers and search engines know what your blog is about. You can set it by selecting the basic settings option under the main “settings panel.”
- To get a free SSL certificate, choose HTTPS Redirect "Yes".
- Posts, Comments, and Sharing.
- You can set up Posts, Comments, and Sharing option.
- Emails
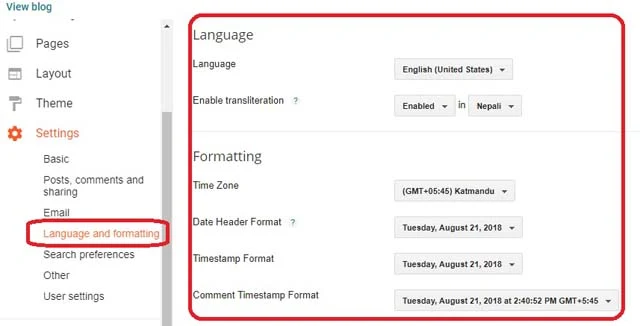
- Languages and Formatting.
- You can set up language and Time format.
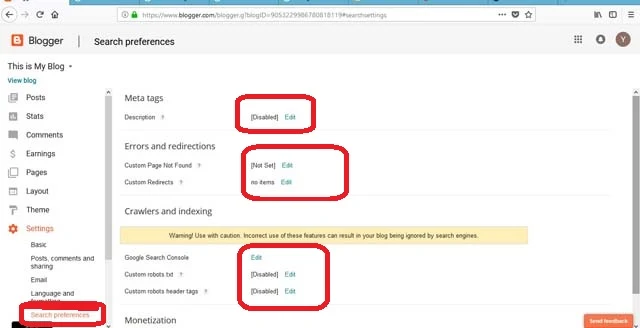
- Search Performance.
- Add Description, You will write a good summary of your blog here. This will appear on search engines and will attract readers to your blog.
- Add Custom Page Not found, When people land on your website through a URL that no longer exists, you can set a message to them that the page doesn’t exist. You can set any custom text or HTML message instructing them on what to do next.
- Custom redirects, If someone links to any of your posts or pages, and you happen to delete that page, or the link to a wrong URL that doesn’t exist, you can use this option to redirect all such backlinks to any single page. Ideally, this should be your homepage URL here.
- Add Robots.txt, Robots.txt is a text file webmasters create to instruct web robots (typically search engine robots) how to crawl pages on their website. The robots.txt file is part of the robots exclusion protocol (REP), a group of web standards that regulate how robots crawl the web, access and index content, and serve that content up to users. The REP also includes directives like meta robots, as well as page-, subdirectory-, or site-wide instructions for how search engines should treat links (such as “follow” or “no follow”). In practice, robots.txt files indicate whether certain user agents (web-crawling software) can or cannot crawl parts of a website. These crawl instructions are specified by “disallowing” or “allowing” the behavior of certain (or all) user agents.
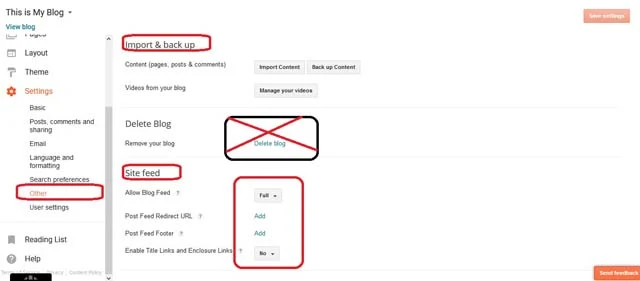
- Others
- Setup Other Feild.
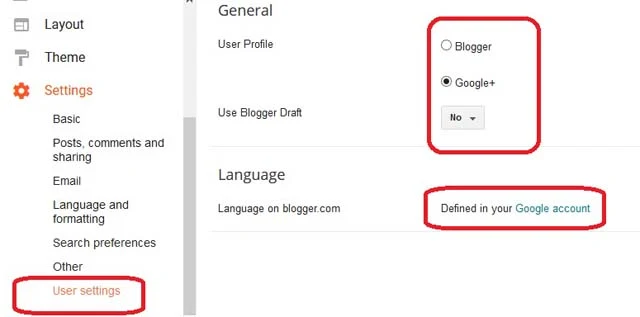
- User settings
- You can set up the Blogger user profile and language.
- Add About us page describing who you are and what your blog is about.
- Add Privacy Policy and Disclaimer pages for legal clarifications as to how your site uses your visitor data and to what factors you are liable to them and whatnot.
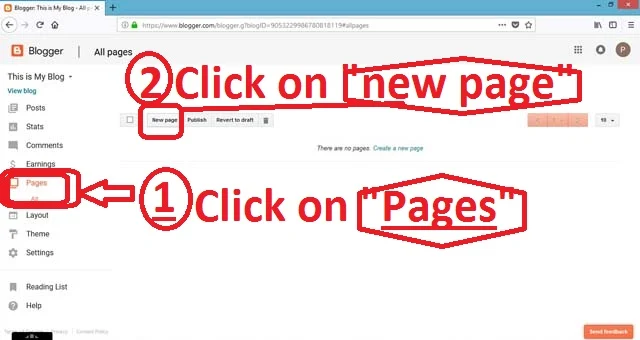
- Click on Pages => New Page
Write your page title and content and click on the Publish button.
STEP 9. Write Post
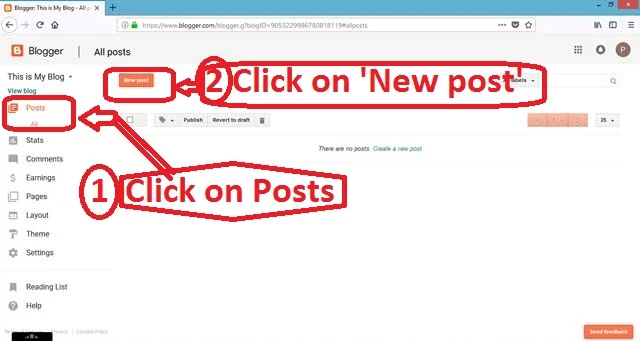
- Click on Post => New Post
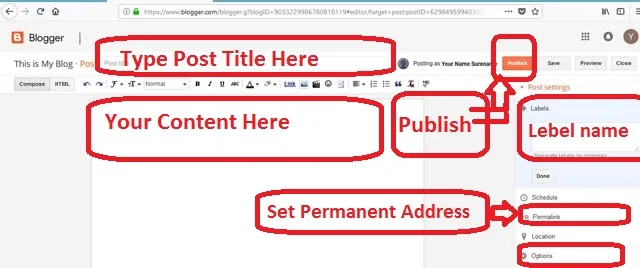
- Enter your Post title and content.
- Give the Label Name.
- Set up Permanent address.
- Write Search Description.
- Click on Options and choose reader comments to allow or disallow.